Linux GUI Installer
Download the binary install from the download page. When the dowload has finished, run the command:
$ chmod +x bk-7.3.3-x86_64-glibc23-linux.bin
Once that is done, simply run the installer to use the install GUI.
$ sudo ./bk-7.3.3-x86_64-glibc23-linux.bin
|
|
If you don’t use sudo to run the installer, you won’t be able
to install in the default installation directory
/usr/local/bitkeeper. You can choose any other destination for
which you have write permission.
|
The next thing we’re presented with is where to install BitKeeper. You can choose any location you want, but if you’re not sure, it’s best to just use the default.
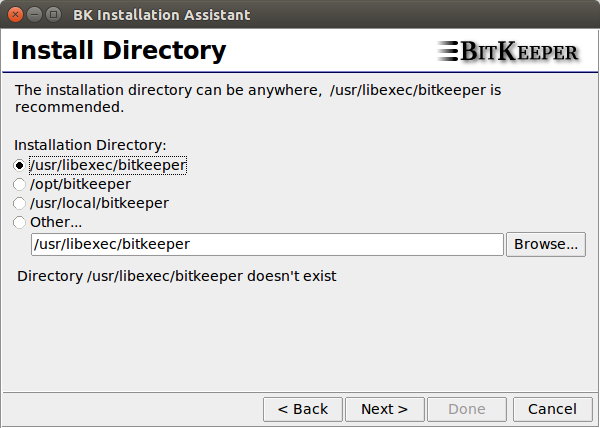
Keep clicking Next until you reach the end of the installer.
|
|
If you didn’t use sudo to run the installer, BitKeeper won’t
be able to create symlinks in /usr/bin for the bk executable. You
will have to manually add BitKeeper’s installation directory to your
PATH environment variable.
|
Linux Command Line Installer
Download the binary install from the download page. When the dowload has finished, run the command:
$ chmod +x bk-7.3.3-x86_64-glibc23-linux.bin
Then run it giving it an install destination:
$ ./bk-7.3.3-x86_64-glibc23-linux.bin /usr/local/bitkeeper
|
|
You must have permissions to write in the installation directory. |
Finally, install a symlink for the bk binary:
$ sudo ln -s /usr/local/bitkeeper/bk /usr/local/bin/bk
OS X
Open your Downloads folder and find the installer package. If you
haven’t downloaded BitKeeper, you can get it from
here.
Double click on it and follow the usual installation procedure.
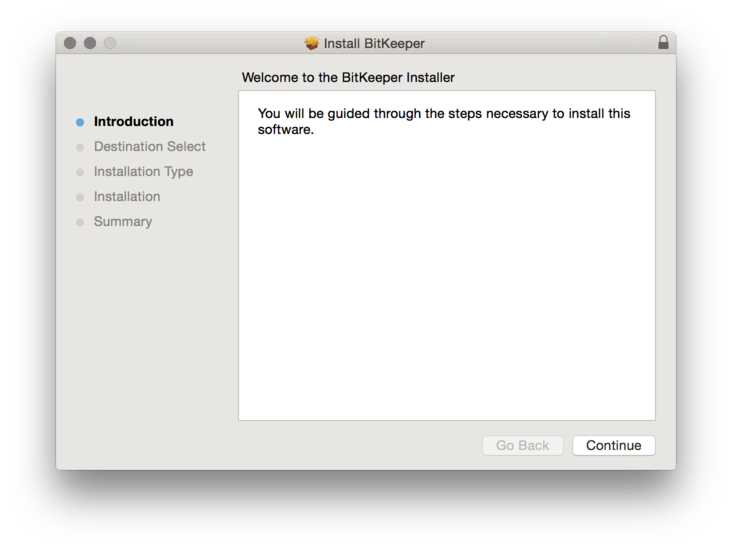
Keep clicking Next until you reach the end of the installer.
|
|
BitKeeper will ask you for an administrator’s password as part of the installation. For 10.9 and 10.10, this is to create a symlink
in For 10.11, |
Congratulations, BitKeeper is now installed on your machine.
Windows
Download the binary from the downloads page.
Double click the installer to launch it, and a window will first pop up telling that it is unpacking. As soon as that’s done, the installer should pop up and get us rolling.
You’ll be asked where to install BitKeeper. You can choose any location you want, but if you’re not sure, it’s best to just let it install to the standard Program Files directory.
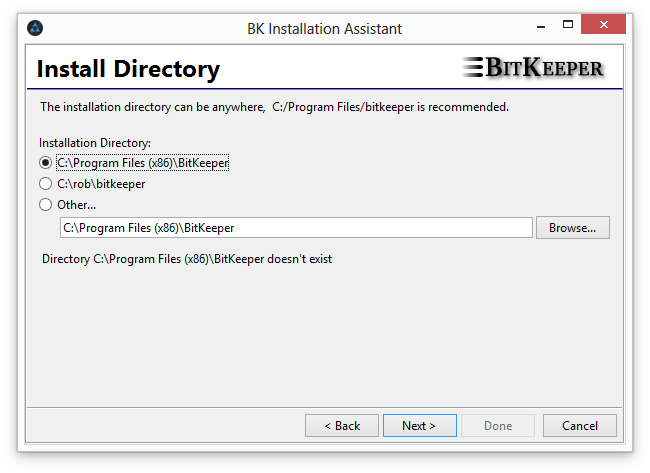
The next thing we’re presented with is where to install BitKeeper. You can choose any location you want, but if you’re not sure, it’s best to just let it install to the standard Program Files directory.
Keep clicking Next until you reach the end of the installer.
Congratulations, BitKeeper is now installed on your machine.
Building From Source
Run the following commands:
$ curl http://www.bitkeeper.org/downloads/latest/bk-7.3.3.src.tar.gz | tar xfz -
$ cd bk-7.3.3/src
$ make -j6
# Run the tests to make sure it works
$ make -kj6 tests
# If any tests fail, the output will be in t/output/BAD.*
To install, build an image by running:
$ make image
And install it following the appropriate procedure for binary installers.